Como insertar fotogramas clave en after effects cs6cómo insertar fotogramas clave en after effects cs6insertar fotogramas clave en after effects cs6insertar. Creating your shape layer. You can keyframe any layer in after effects, including video clips and photos, titles and graphics, but we’re going to start by creating a shape.
Grab the shape tool and draw your chosen shape in the media viewer. A keyframe is a point that determines certain attributes of a clip. This could be a clip’s position, scale, opacity, rotation, and more.
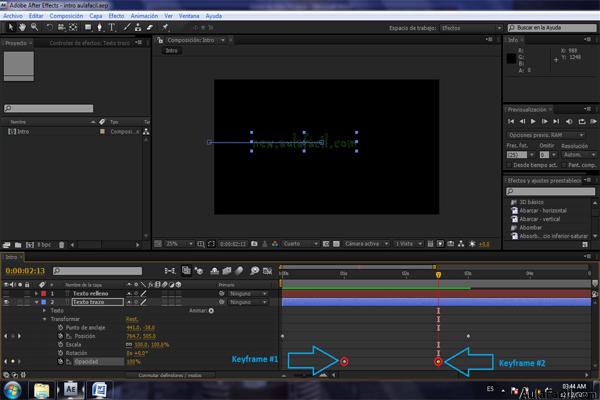
When you create two keyframes on a clip in after effects and those two keyframes have different properties, the clip will animate between those two points. For example if you alter the horizontal position. How to add a keyframe in after effects step 1:
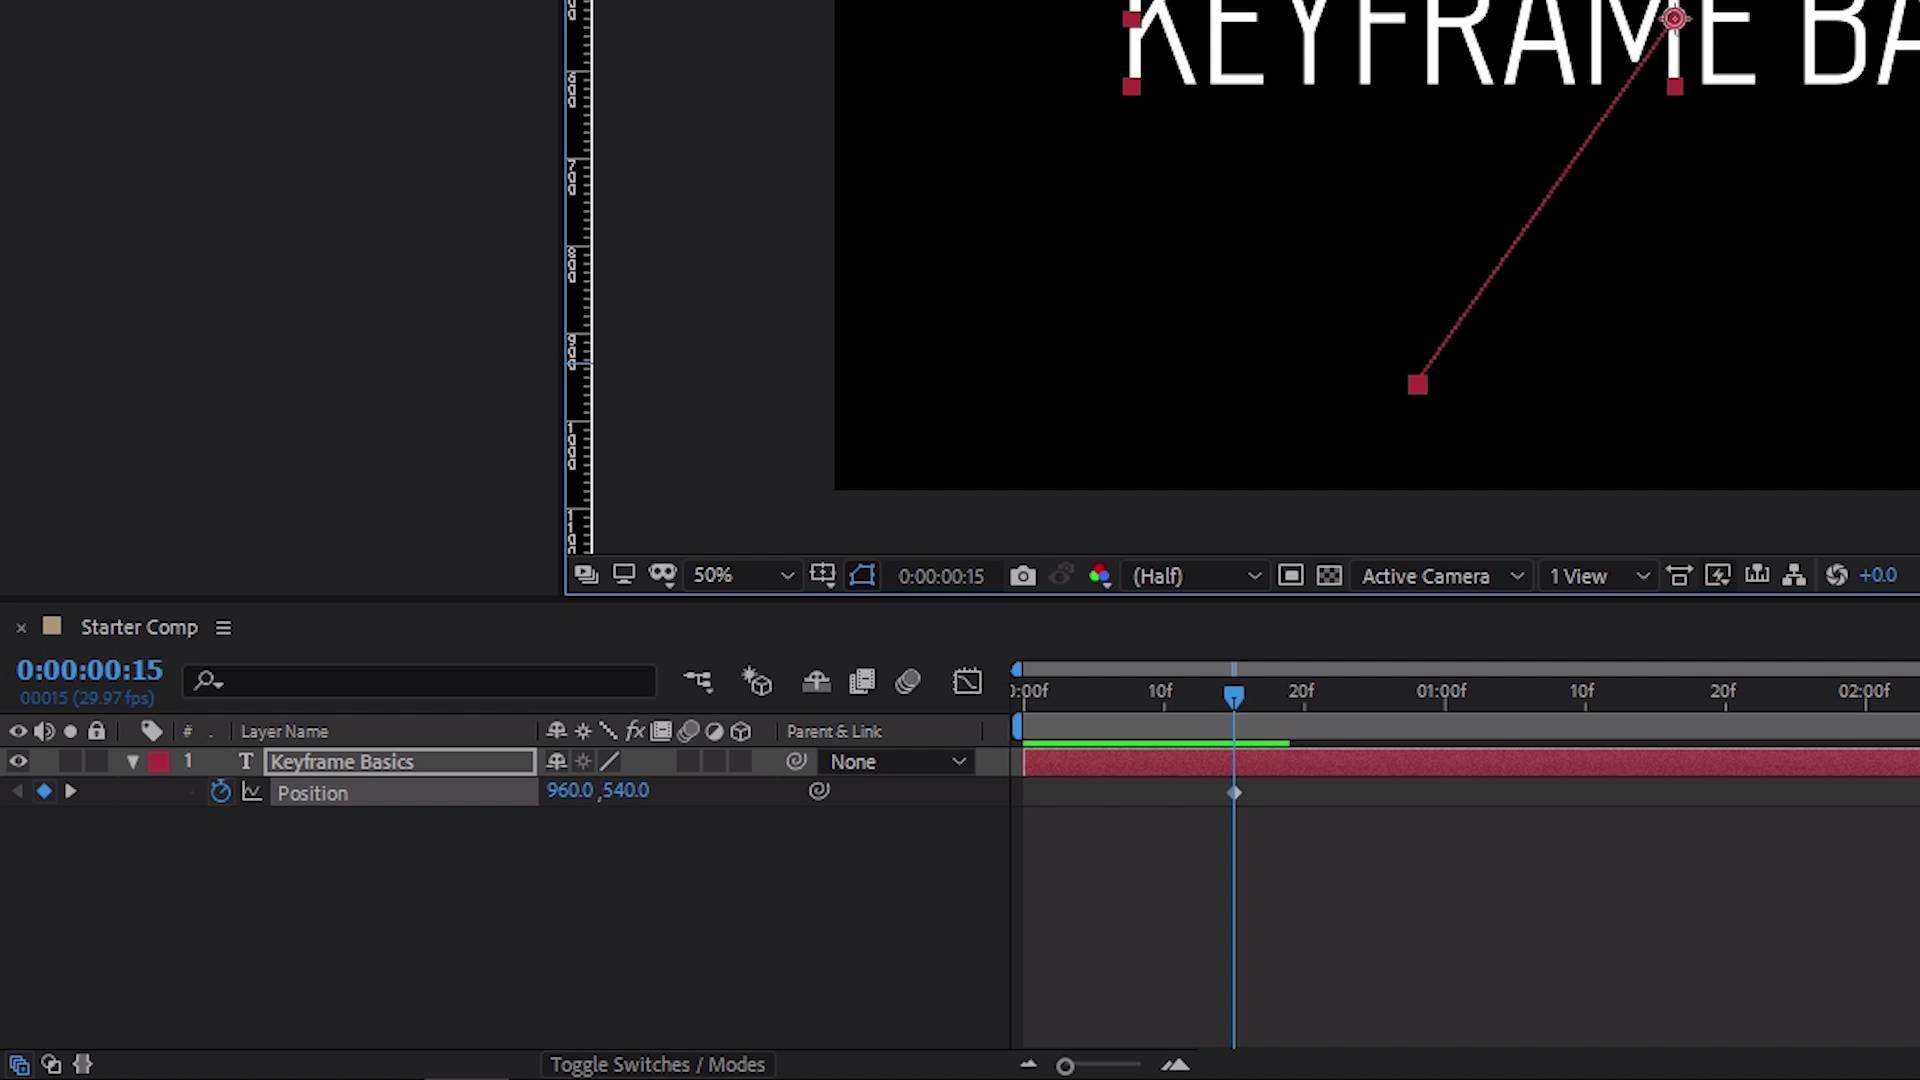
Place your cti where you want your keyframe effect to start. Choose what property you’d like to create an effect with. This could be scale, position, opacity, rotation, etc.
Here's a quick outline on how to set a keyframe in after effects: Set a starting value & select the stopwatch icon next to the property. Move your playhead to a new spot in the timeline.
Adjust the second value. Simply choose the moment you want the animation to end, by moving the cursor, change the numeric value to whatever you desire, and the keyframe will be added automatically. This will insert a keyframe at the current time of your cursor on the.
The keyframe value appears at the top of the context menu that appears. Choose edit value to edit the value, if desired. Place the pointer over a keyframe in layer bar.
Select your starting position and add a keyframe with the stopwatch icon. Set the first keyframe by moving your layer or property value to its desired setting. Once in this position, toggle down the property that you want to animate.
In my case this is the position and rotation. Click the stopwatch icon to add your first keyframe. Open after effects and load all the layers to the layer pane to start keyframing.
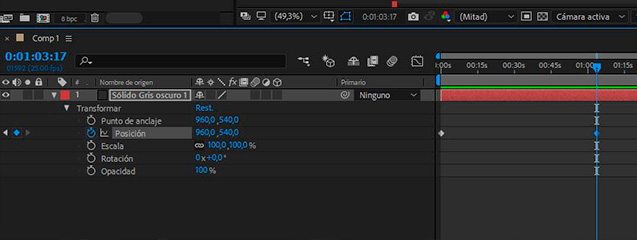
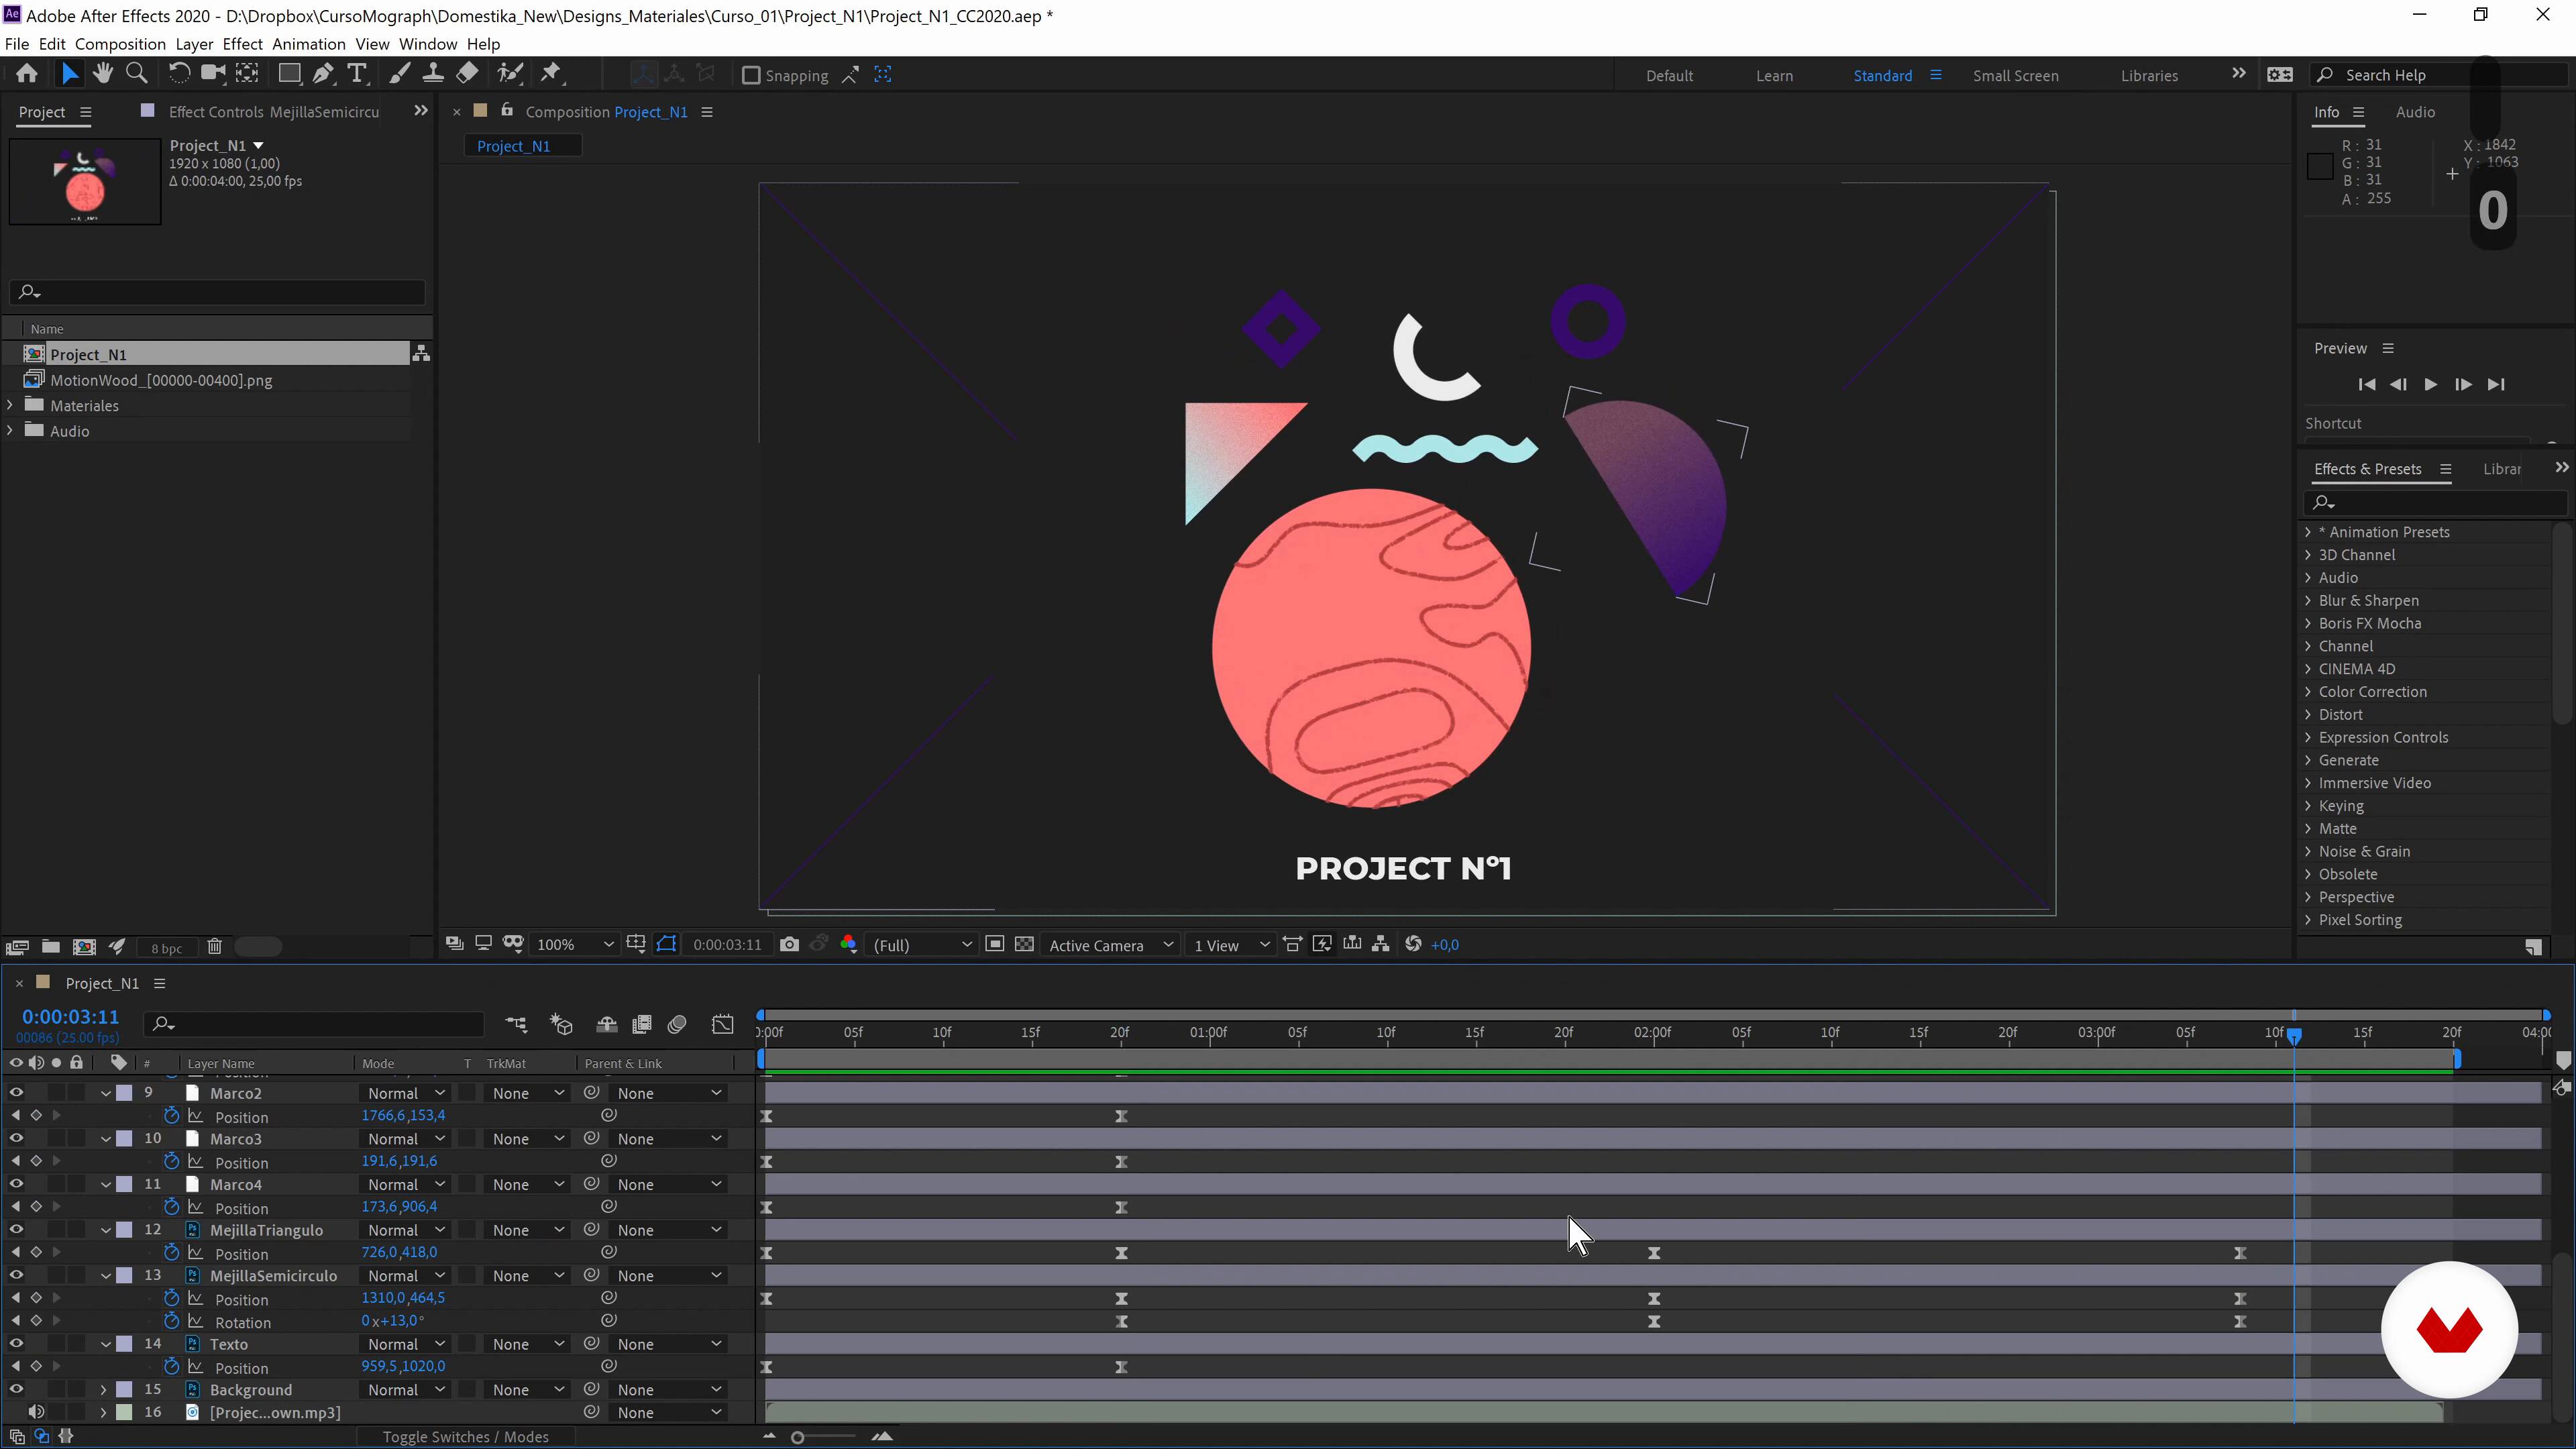
Open the transformation properties of the layer, which must be moved by clicking the small triangle beside the layer name. Check the available positioning options. As we are going to change the position of the logo.
Delete or disable keyframes. To delete any number of keyframes, select them, and then press the delete key. To delete all keyframes for one layer property, click the stopwatch button to the left of the name of the layer.
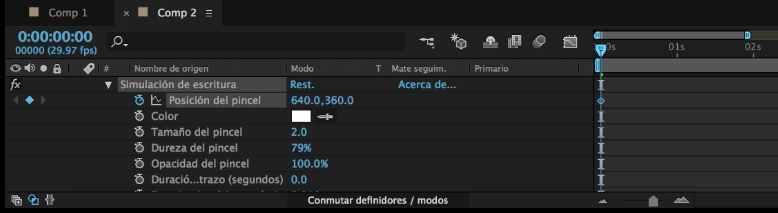
En este capítulo hablaremos de cómo y qué podemos animar en adobe after effects haciendo uso de los atributos que vimos en el video anterior. Seguro que estáis deseando crear vuestras animaciones, ¡vamos a ello!. Para animar elementos en adobe after effects vamos a usar un nuevo tipo de elemento llamado fotograma clave o keyframe en inglés.
Select the layer you would like to animate. Open the parameter you would like to animate by clicking the arrow to the left of the layer name. Continue to twirl open any subsequent arrows revealed to open specific groups of parameters, such as the transform properties.
Reposition or adjust the layer in the composition for your. Crear keyframes con after effectsdescripción: Opciones de transformación de adobe after effects.
Furió vita dolores+ uni.